This document provides an instruction to integrate the Monkey's model about handwriting to edge devices.
Tech Stack
- TensorFlow Lite
- Unity
Introduction
Handwriting is an AI model, which was converted to TensorFlow lite format supported by Google for multi-platforms.
The model can be downloaded at here
1. Hyperparameters
Some configurations of the model:
| Name config | Description | Value |
|---|---|---|
| Input shape | Shape of input: It is an image converted to size width x height x channel 128 x 128 x 3 (BGR) | 1 x 128 x 128 x 3 |
| Output | It is a score array to predict each class. To get the prediction label, we will choose a max value in the output array | 1 x 26 |
The mapping index to the prediction character will be shown below.
{"0": "a", "1": "b", "2": "c", "3": "d", "4": "e", "5": "f", "6": "g", "7": "h", "8": "i", "9": "j", "10": "k", "11": "l", "12": "m", "13": "n", "14": "o", "15": "p", "16": "q", "17": "r", "18": "s", "19": "t", "20": "u", "21": "v", "22": "w", "23": "x", "24": "y", "25": "z"}
Example: The model predicts for an image with output:
[[7.8083836e-03 1.0330592e-02 3.6540066e-04 1.1240702e-01 1.2986563e-01
  8.1596321e-05 2.7041843e-03 1.8760953e-02 1.5376755e-03 8.4590465e-05
  1.9241240e-02 2.4502007e-02 2.1457224e-01 1.2494331e-02 1.9096583e-02
  2.9417273e-04 2.1153286e-02 1.8904490e-02 6.2950579e-03 3.8062898e-03
  1.2752166e-01 2.5853007e-03 1.6490310e-01 3.3960843e-03 2.3415815e-03
  7.4946553e-02]]
We can see that index 22 is the maximum value (index starts from 0) with a confidence score of 16%. Mapping to label, it is character 'v'.
3. Pre-install for model
The model requires an image with a shape of 128 x 128 x 3
The model could recognize exactly. The image should be handled by logic and requirements
- Text: black
- Background: white
- Object: center of image
- Size of object = 50 - 60 % of the image.
- Resize image (128 x 128 x 3)
- Value type: Fp32
"""
def pre_process(self, img):
    # Cropping
    mask = img != 255
    mask = mask.any(2)
    mask0,mask1 = mask.any(0),mask.any(1)
    colstart, colend = mask0.argmax(), len(mask0)-mask0[::-1].argmax()+1
    rowstart, rowend = mask1.argmax(), len(mask1)-mask1[::-1].argmax()+1
    img = img[rowstart:rowend, colstart:colend]
    img_h, img_w = img.shape[0], img.shape[1]

    # Padding
    # Create white image
    img_size = img_w if img_w > img_h else img_h
    img_size = int(1.9 * img_size)
    new_img = np.zeros([img_size , img_size , 3], dtype=np.uint8)
    new_img.fill(255)

    # insert text image into white image
    start_w = int((new_img.shape[1] - img_w ) /2)
    start_h = int((new_img.shape[0] - img_h ) /2)
    new_img[start_h : start_h + img_h,start_w : start_w + img_w ,:] = img[:,:,:]

    # thicken text.
    iterations = int(img_size / 128)
    if iterations > 1 :

        kernel = np.ones((5, 5), np.uint8)
        new_img = cv2.erode(new_img, kernel, iterations=iterations)

    # resize image
    new_img = cv2.resize(new_img, (self.size, self.size), interpolation = cv2.INTER_AREA)
    new_img = np.array(new_img, dtype=np.float32)
    return new_img
"""
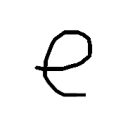
Example input:

2. Installation
3. Usage API from Server
Live:https://app.monkeyenglish.net/mspeak/handwriting
Dev: https://ai.monkeyenglish.net/handwriting
| Field | Description |
|---|---|
| URL | |
| Method | POST |
| Header | 'APIKEY': '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' |
| Body | {"image" : string base 64 of an image}, "pre_process": true , "target" : "" |
| Response | { |
"status": true,
"text": [
    {
        "character": "z",
        "conf_score": 100.0
    },
    {
        "character": "o",
        "conf_score": 100.0
    },
    {
        "character": "c",
        "conf_score": 100.0
    }
],
"msg": ""
} |
- Note:
- pre_process: The system will pre-process the image to enhance the performance of the model
- target: "a" - text wants to compare with predict (nullable). You can push anything
- In response: text - is a prediction of the image, conf is a confident score (0-100%)
