-
 hainv
posted in Monkey Stories 2.0 • read more
hainv
posted in Monkey Stories 2.0 • read more- Popup Service là hệ thống quản lý Popup trong MS 2.0
- Popup Service sẽ sử dụng queue để quản lý thứ tự hiển thị các popup. Chỉ có 1 popup xuất hiện trên màn hình tại 1 thời điểm.
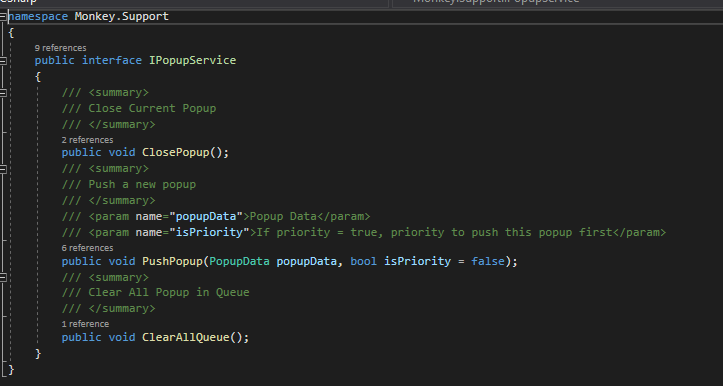
- Cấu trúc interface IPopupService
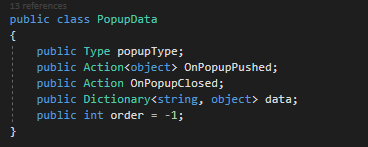
- Cấu trúc Popup Data
Cách sử dụng
- Setup một Popup
- Tạo Popup Controller
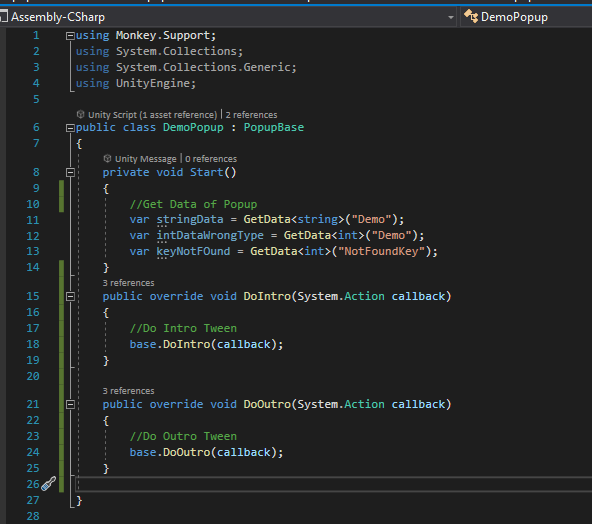
- Class của popup controller phải kế thừa lại PopupBase
- Có thể override lại method DoIntro và DoOutro để thực hiện Animation khi mở và đóng popup nếu cần
- Tạo Popup Prefab
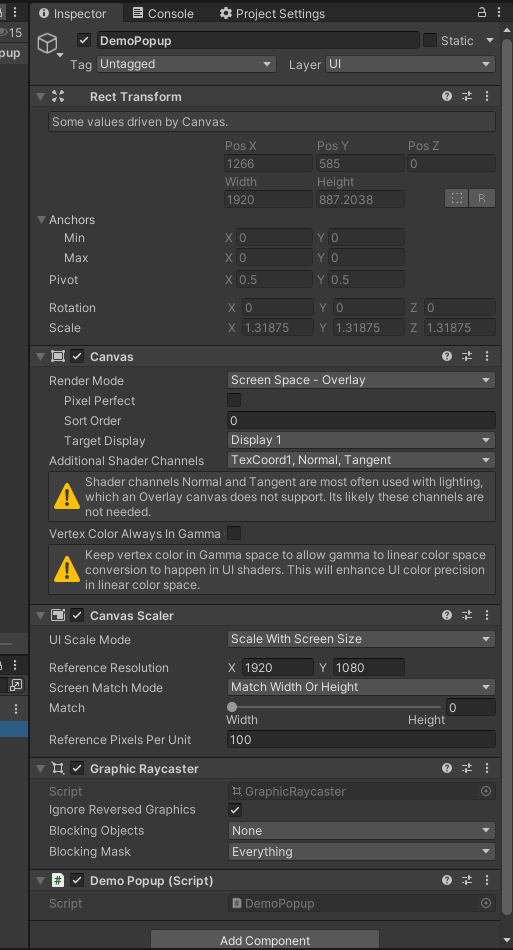
- Kéo Scripts Popup Controller vào ngang hàng với Canvas của Popup
- Gọi Hàm Close để đóng popup
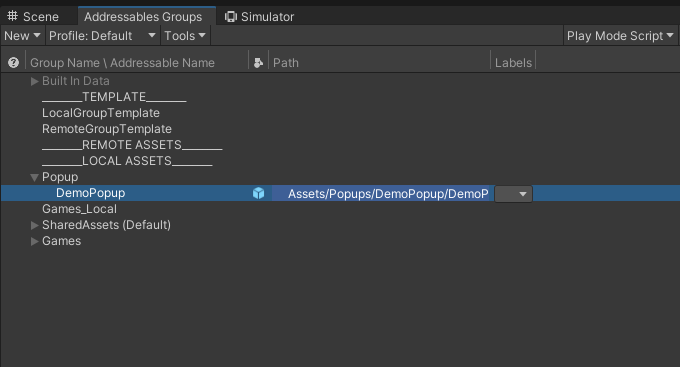
- Kéo Prefab vào Group Popup trong Addressable. Tên của popup trong addressable phải trùng với tên của class Popup Controller
- Tạo Popup Controller
- Push Popup lên màn hình
 var popupService = SupportSystem.Instance[SupportSystem.ServiceIDs.PopupService] as IPopupService;
PopupData popupData = new PopupData()
{
      //Type của Popup Controller
      popupType = typeof(DemoPopup),
      // Data truyền vào trong Popup. Data này sẽ lấy được khi Popup chạy vào hàm Start.
      data = new Dictionary<string, object>()
      {
           {"Demo", "Value" }
      },
     //Callback khi Popup hiện lên trên màn hình
      OnPopupPushed = (obj) =>
      {
           DebugMonkey.Log(() => $"Popup Pushed: {obj.GetType().Name}");
      },
      //Callback khi đóng Popup
      OnPopupClosed = () =>
      {
           DebugMonkey.Log(() => "Popup Closed");
      },
      //Override lại sorting của canvas. nếu ko set giá trị thì canvas sẽ giữ nguyên sorting của prefab
      order = 100
}
popupService.PushPopup(popupData);
- Editor
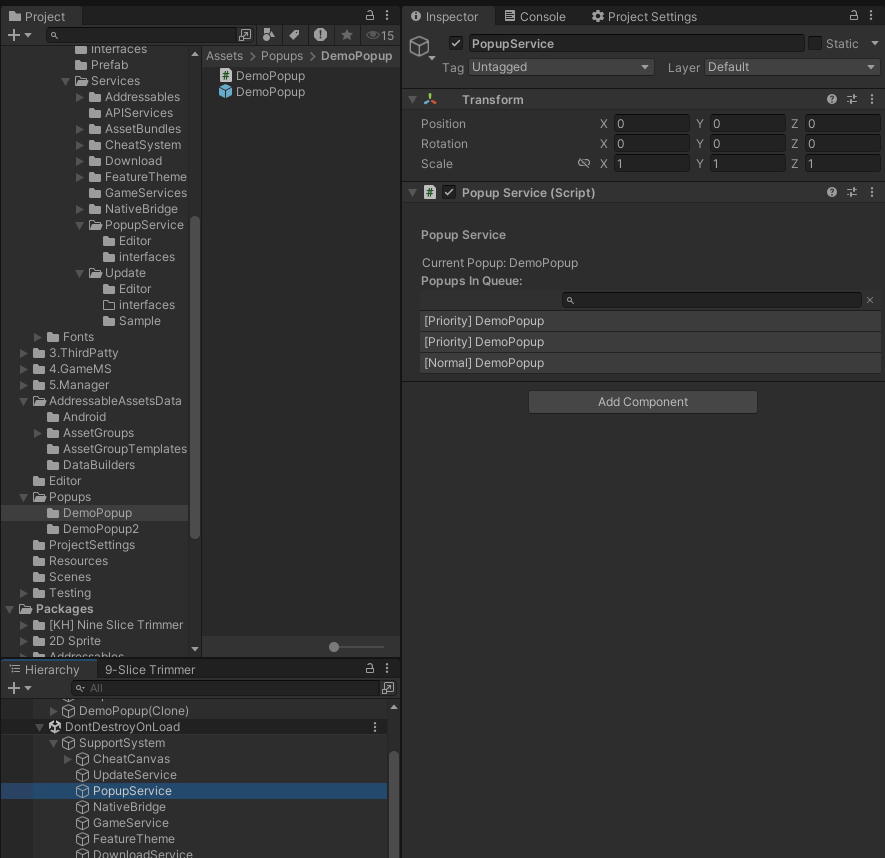
trong Inspector của PopupService, có thể xem được Popup hiện tại trên màn hình vào danh sách Popup trong Queue.Popup sẽ hiển thị lần lượt theo danh sách trong Popups In Queue- Các lỗi có thể gặp phải
- PopupData cant be null => PopupData không thể null
- PopupDemo is not a Popup => Class PopupDemo không được kế thừa PopupBase
- Load prefab popup from Addressable failed => Không load được Popup từ Addressables
- [ERROR] Get Data with Key: {key}. the data type is wrong. cant cast {value.GetType().Name} to {typeof(T).Name} => Key tồn tại trong data nhưng sai value sai định dạng
- [ERROR] Get Data with Key: {key}. Key not found => Key trong data không tồn tại
-
hainv
posted in Chung • read more
-
Assetbundle Pipeline được quản lý tại git repo:
https://github.com/eduhub123/MonkeyXAssetBunldeBuilder -
Script build: CreateAssetBundles.cs
- Cấu trúc:
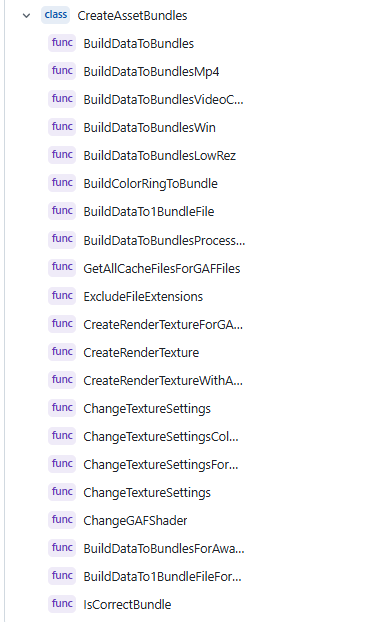
- Cấu trúc:
-
Khi build Assetbundle, Unity sẽ tự động setting thông số cho từng Assets theo config được đặt sẵn trong code.
-
Assetbundle sẽ được build cho 3 platform:
- Android
- Ios
- Standalone (PC Win)
-
Load file Assetbundles trong MJ5: Scripts: AssetBundleManager.cs
- Cấu trúc:
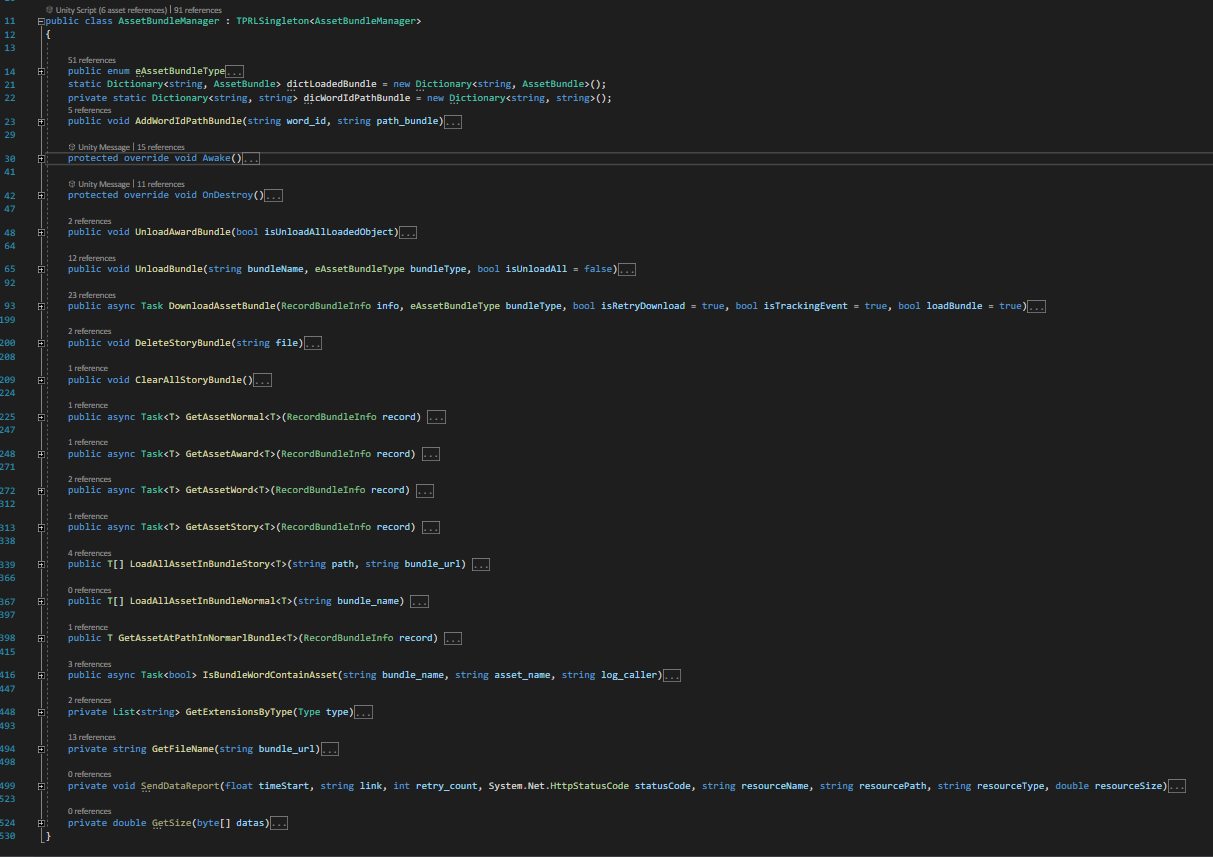
- Hàm load Assetbundle
- AssetBundleManager.Instance.GetAssetAward<T>(record);
- AssetBundleManager.Instance.GetAssetNormal<T>(RecordBundleInfo record)
- AssetBundleManager.Instance.GetAssetWord<T>(RecordBundleInfo record)
- AssetBundleManager.Instance.GetAssetStory<T>(RecordBundleInfo record)
- Assetbundle sẽ tự động download nếu chưa tồn tại
- Cấu trúc:
-
-
hainv
posted in Chung • read more
Theo dõi chỉ số Crash free:
https://firebase.google.com/
Kiểm tra chỉ số free crash trên Firebase Crashlytics.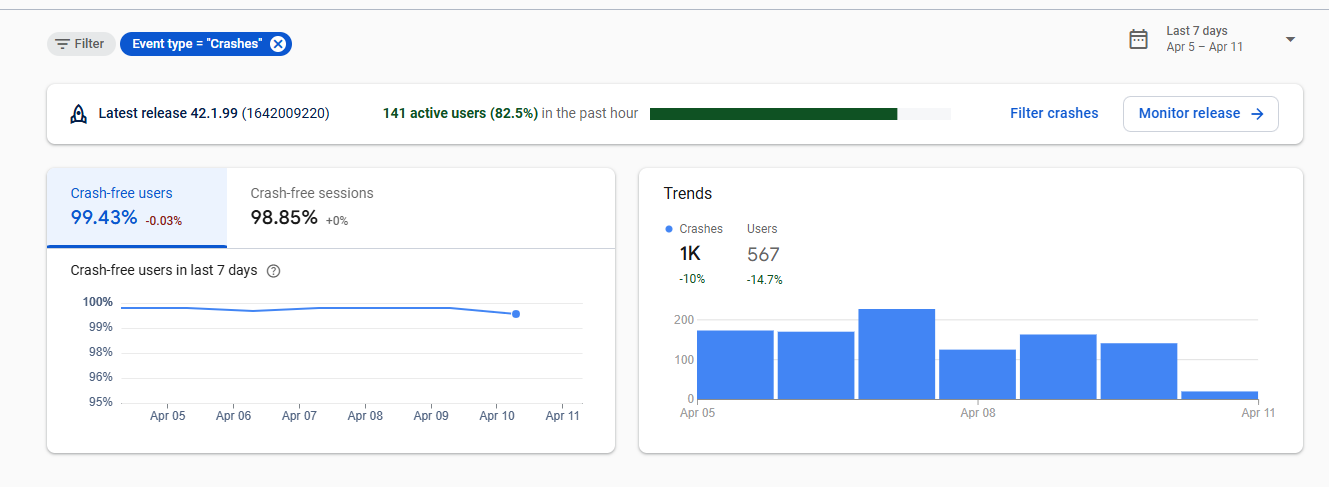
Chỉ số cần quan tâm:
Crash free users: tỷ lệ user không bị crash.
Crash free session: tỷ lệ session không bị crashCách tăng chỉ sổ Crash free:
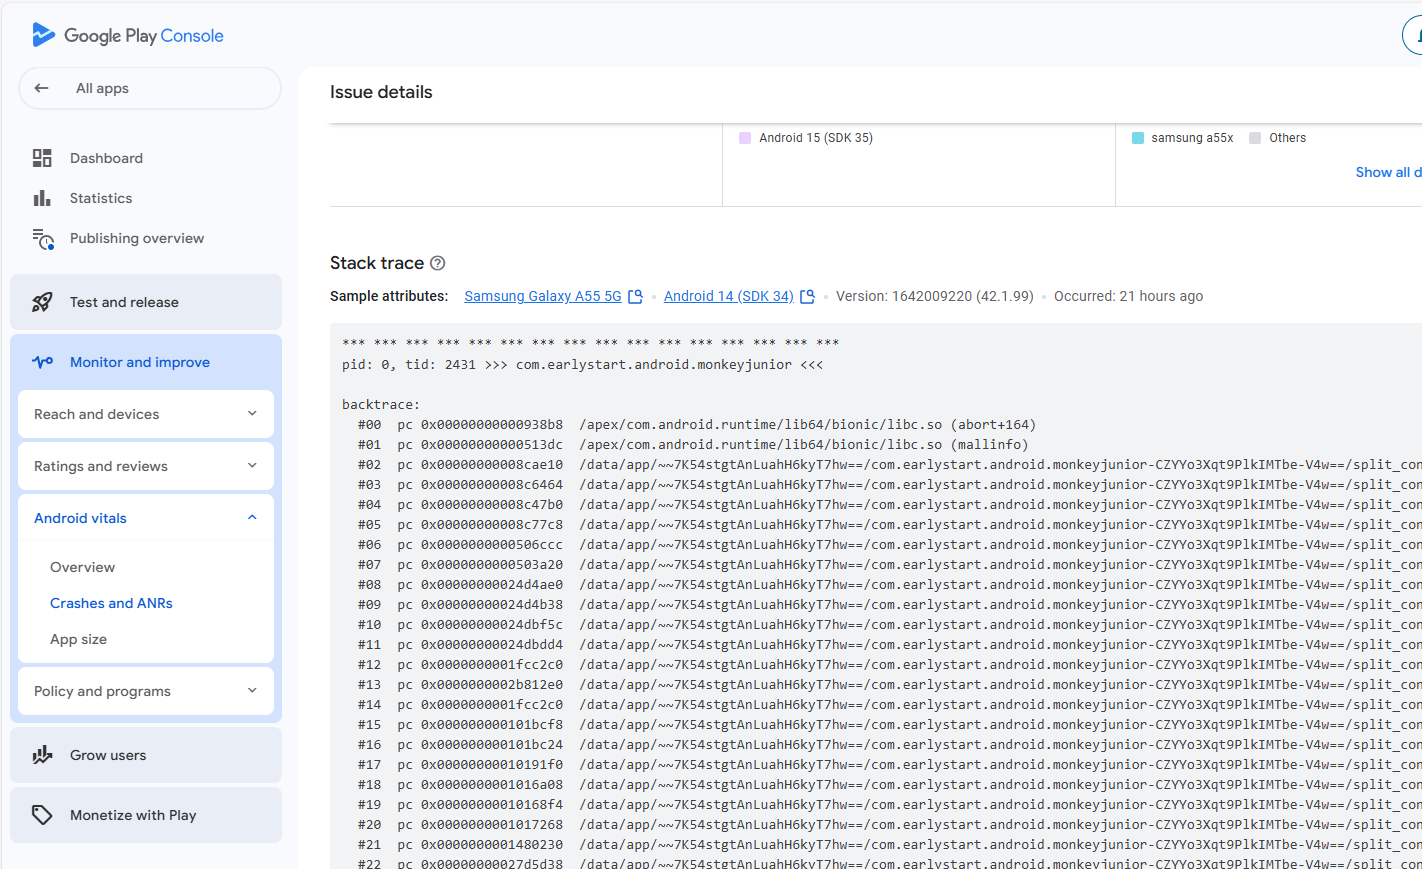
Kiểm tra mục Issues của crashlytics
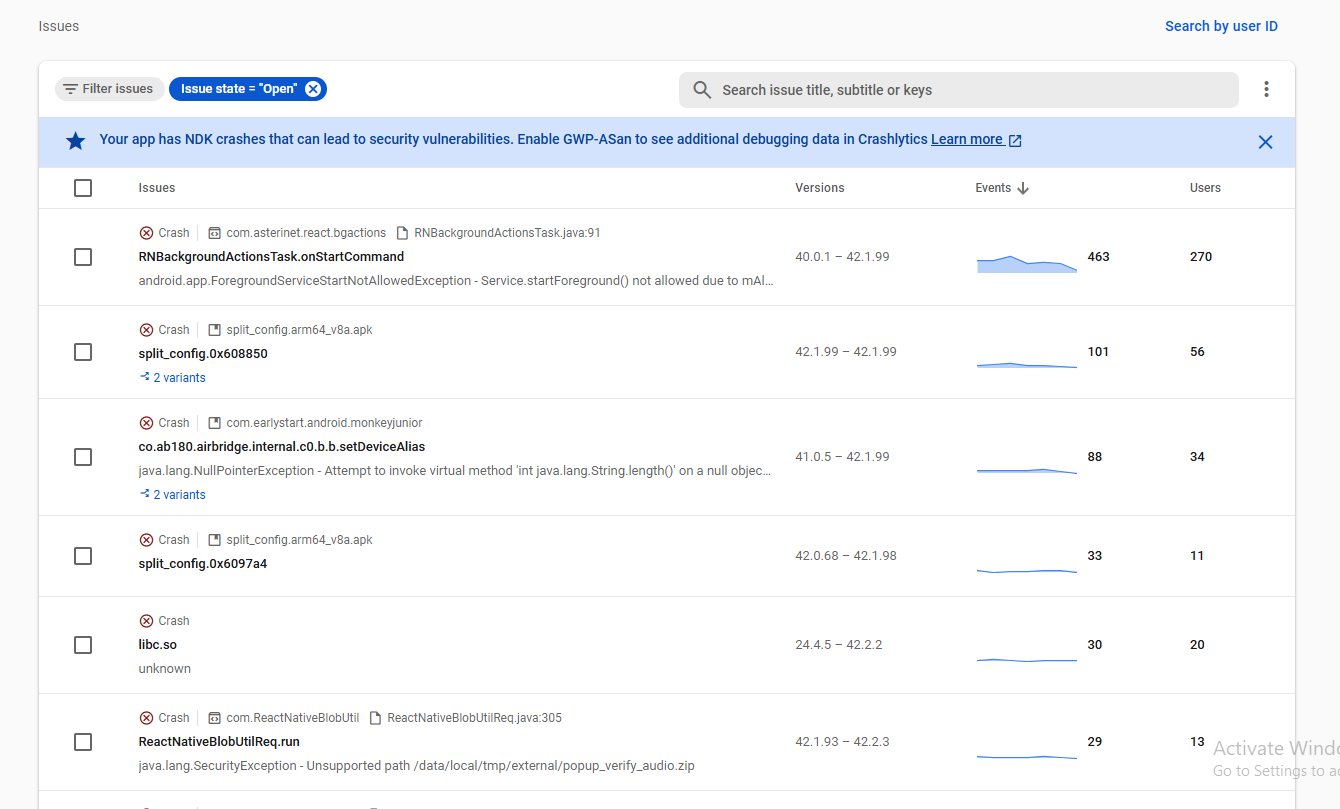
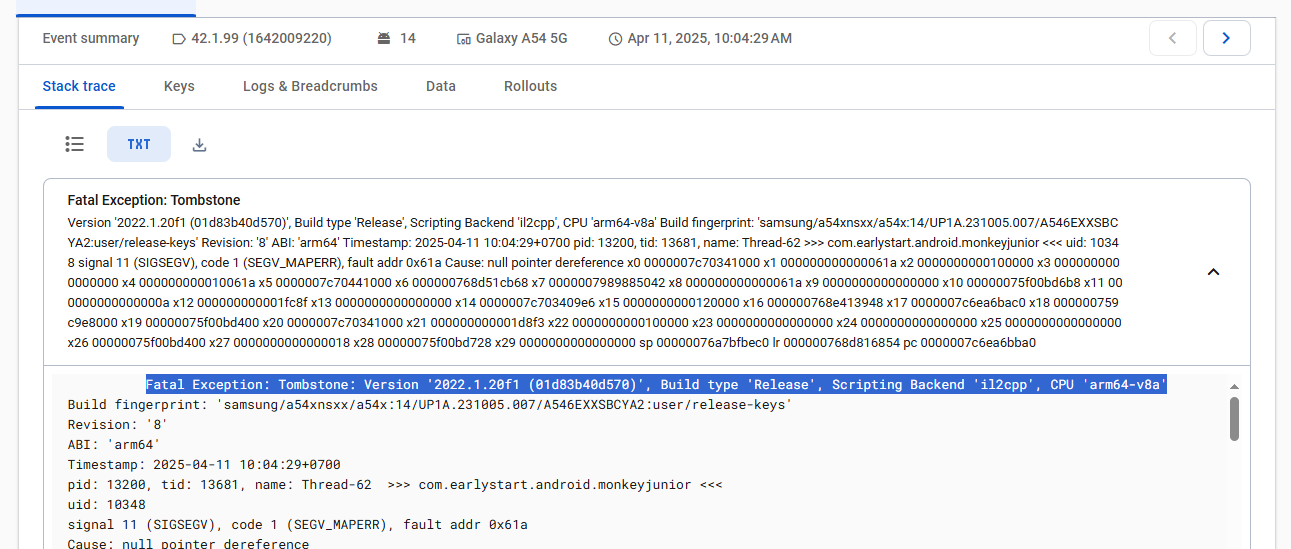
- Nhận biết các lỗi crash từ Unity:
Các lỗi crash từ Unity thì sẽ có thông tin Unity version
- Các lỗi thường gặp phải:
- Out of memory
- Lỗi I/O
- Lỗi do Vulkan trên các máy cũ
Kiểm tra thêm chi tiết các lỗi crash trên Crashes and ARN của playstore
- Nhận biết các lỗi crash từ Unity:
-
hainv
posted in Monkey Stories 2.0 • read more
Project build: https://github.com/eduhub123/MonkeyStory2GameBuilder
Script Auto Build: build_game.bat
Trong script build cần config các thông tin:
UNITY_PATH=<Path Unity Editor>
ADDRESSABLE_PROJECT_PATH=<Path Build Project>
MAIN_PROJECT_PATH=<Path Monkey Story 2.0 Project>Script Build c#: GameBuild.cs
Cách download game trong MS 2.0
Cấu trúcpublic interface IGameService { public void DownloadGameBundle(int gameId, Action<bool> callback); public void LoadGameCatalogs(int gameId, Action<bool> callback); }Download Game:
IGameService gameService = SupportSystem.Instance[SupportSystem.ServiceIDs.GameService] as IGameService;
gameService.DownloadGameBundle(gameConfigData.GameID, IsSuccess =>
{
     //Callback sau khi download xong
});
Load Catalogs
IGameService gameService = SupportSystem.Instance[SupportSystem.ServiceIDs.GameService] as IGameService;
gameService.LoadGameCatalogs(gameConfigData.GameID, IsSuccess =>
{
       if (IsSuccess)
             //Load Game
       else
       {
            Debug.LogError("Load Game Catalogs Failed");
       }
});
Sau khi load catalogs thành công thì có thể load game từ Addressables như bình thường
-
hainv
posted in Base • read more
Các bước build MJ5 PC:
- main branch: dev_intergration/pc_build/main
Bước 1: Github
- tạo 1 branch mới từ branch main.
- Merge code mới nhất từ develop_intergration vào branch vừa tạo
Bước 2: Nâng version
- Nâng version trong Project Setttings
Bước 3: Build Standalone
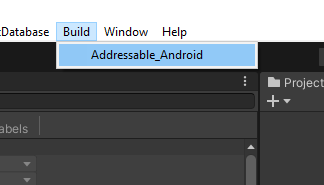
- Build Addressable: từ menu của unity editor chọn Build/Addressable_Android
- Build Standalone: Build standalone từ Build Setting như bình thường.
Bước 4: Đóng gói Installer
Sử dụng phần mềm Advanced Installer phiên bản 21.3.1- Mở file copy_ms.back(19.1) trong project proj.setup
- Thay thế toàn bộ files trong Application folder bằng files vừa mới build
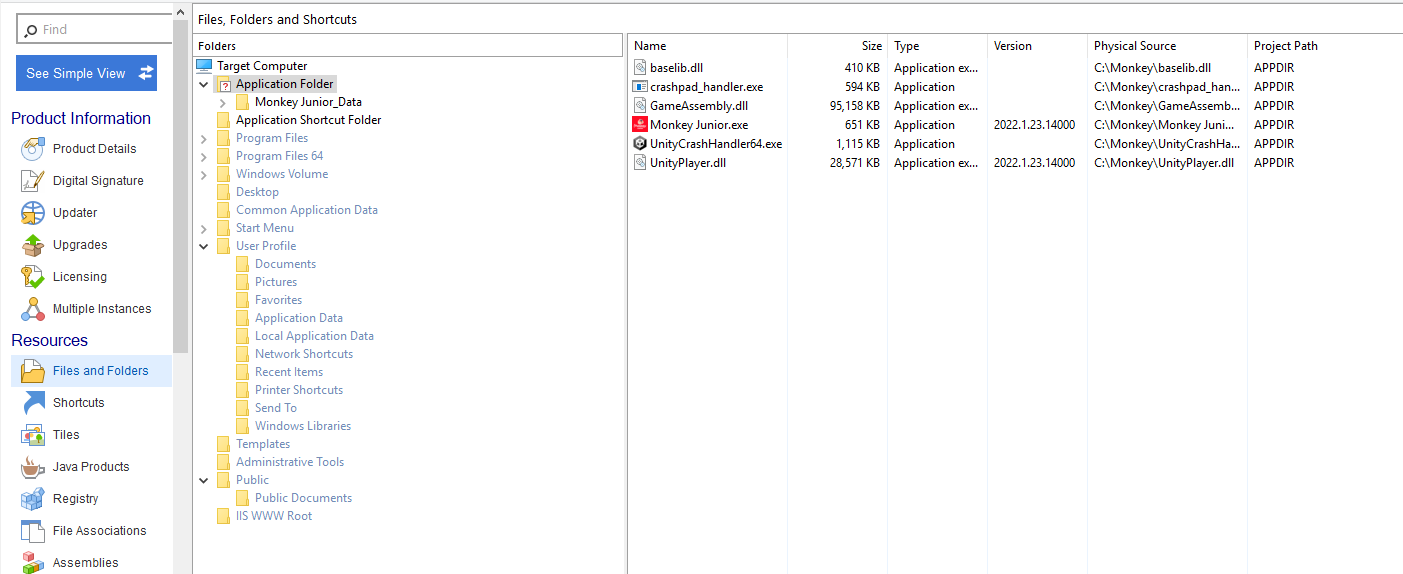
- Nâng version trong Project details
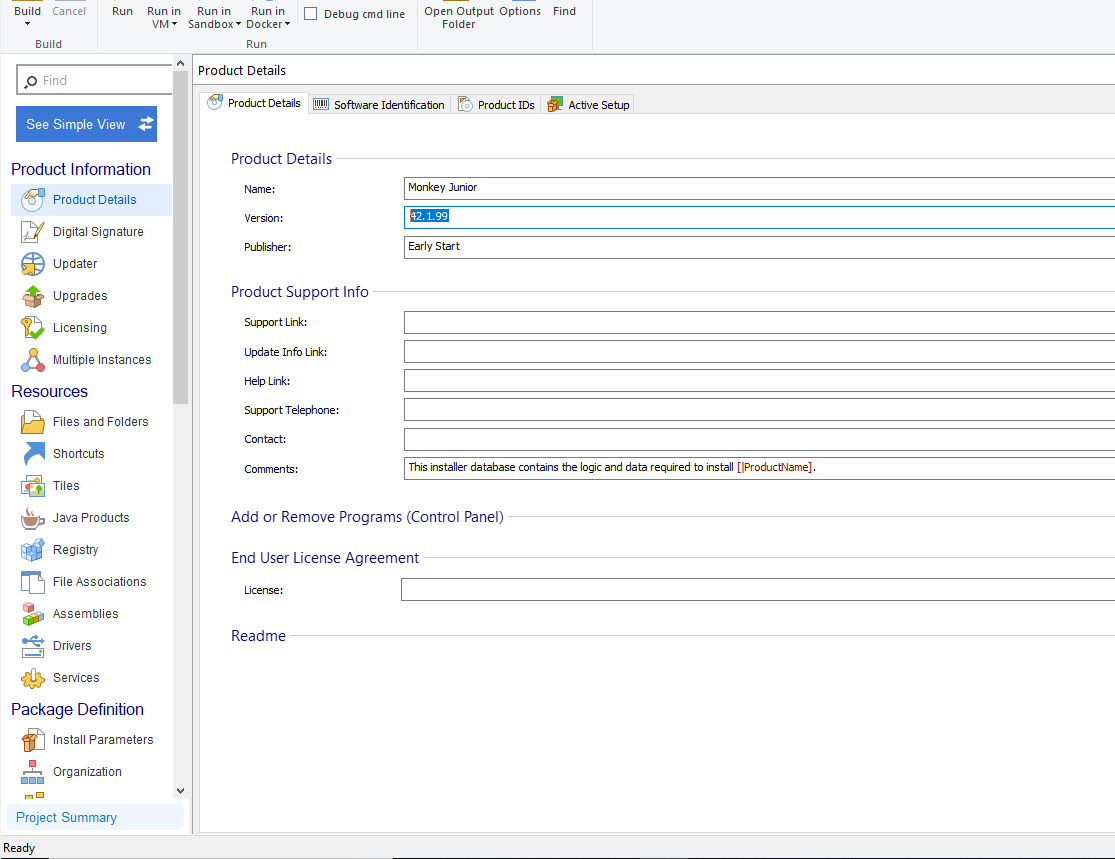
- Bấm build
-
hainv
posted in Base • read more
- Hệ thống Addressable cho MJ5 sử dụng để build Assets trong Unity (Images, Audio, Prefabs, Scenes)
- Addressables Version 1.21.19
- Cấu trúc Groups:
- Remote Groups: Groups sẽ được đẩy lên cdn và download trong quá trình mở Unity
- Local Groups: Groups sẽ được build cùng với bản build.
- Remote Groups
- Path lưu trữ: {UnityEngine.Application.persistentDataPath}/Addressables
- Cấu trúc đặt tên group: bắt đầu với GROUPNAME_
- Các groups có cùng prefix sẽ zip lại cùng với nhau.
Lưu ý: remote groups chỉ được dependence với các groups có cùng prefix hoặc local groups.
- Script quản lý Addressable:
namespace Monkey.Support.Addressable
{
    public interface IAddressableService
    {
        /// <summary>
        /// Download Addressable Group
        /// </summary>
        /// <param name="groupName">Group Name</param>
        /// <param name="callback">Callback when Download finished</param>
        /// <param name="progress">Callback the progress</param>
        /// <param name="total_retry">No need to change the value</param>
        /// <returns></returns>
        IEnumerator DownloadGroup(string groupName, Action<bool> callback, Action<float> progress = null, int total_retry = 0);
        bool IsNeedDownload(string groupName);
        void LoadAssets<T>(string asset_name, Action<AsyncOperationHandle<T>> callback) where T : UnityEngine.Object;
        bool HasKey(string key);
        /// <summary>
        /// Check when Addressable service ready
        /// </summary>
        /// <returns></returns>
        bool IsServiceActive();
    }
}
- Cách download group:
- Kiểm tra xem group có cần download hay không
IAddressableService addressable = SupportSystem.Instance[SupportSystem.ServiceIDs.AddressableService] as IAddressableService; bool isNeedDownload = addressable.IsNeedDownload("GROUP NAME");- Download Group
IAddressableService addressable = SupportSystem.Instance[SupportSystem.ServiceIDs.AddressableService] as IAddressableService;
CoroutineRunner.instance.RunCoroutine(addressable.DownloadGroup("GROUP NAME", isDone => {
  //Callback khi download thành công
  }, progress => {
  //Callback download progress
  }));
- Build Addressables
Script quản lý build Addressables: RNBuild.cs
Method: static void BuildAddressable(string buildPlatform)
Hàm build addressables thực hiện 3 bước:- Clean up
- Build Addressable
- Zip and upload to cdn
- Các lỗi thường xảy ra
Lỗi không load được dependenciesOperationException : GroupOperation failed because one of its dependencies failed RemoteProviderException : Invalid path in AssetBundleProvider:cách kiểm tra:
- Kiểm tra xem group đã được download hay chưa.
- Kiểm tra xem có assets nào depend đến remote group khác không.
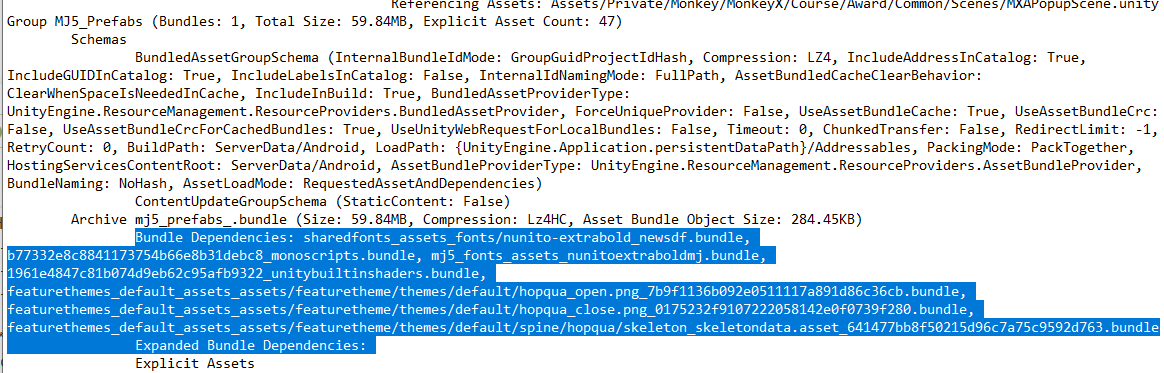
mở file buildlayout.txt trong folder: MonkeyX\Library\com.unity.addressables
Kiểm tra Bundle Dependencies và Expanded Bundle Dependencies
-
hainv
posted in Monkey Stories 2.0 • read more
9-Slice Trimmer là package để optimize Sprite hỗ trợ 9-Slice
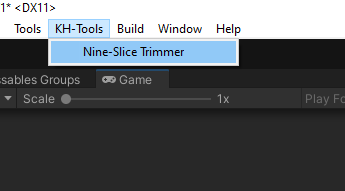
Để mở cửa sổ 9-Slice Trimmer. Chọn KH-Tools/Nine-Slice Trimmer trên thanh Menu
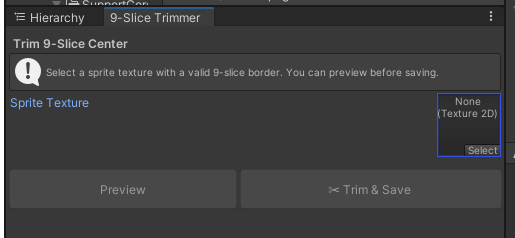
Cửa sổ của tool như sau:
Hướng dẫn sử dụng:
Bước 1: Chọn ảnh cần cắt và config vị trí cần slice
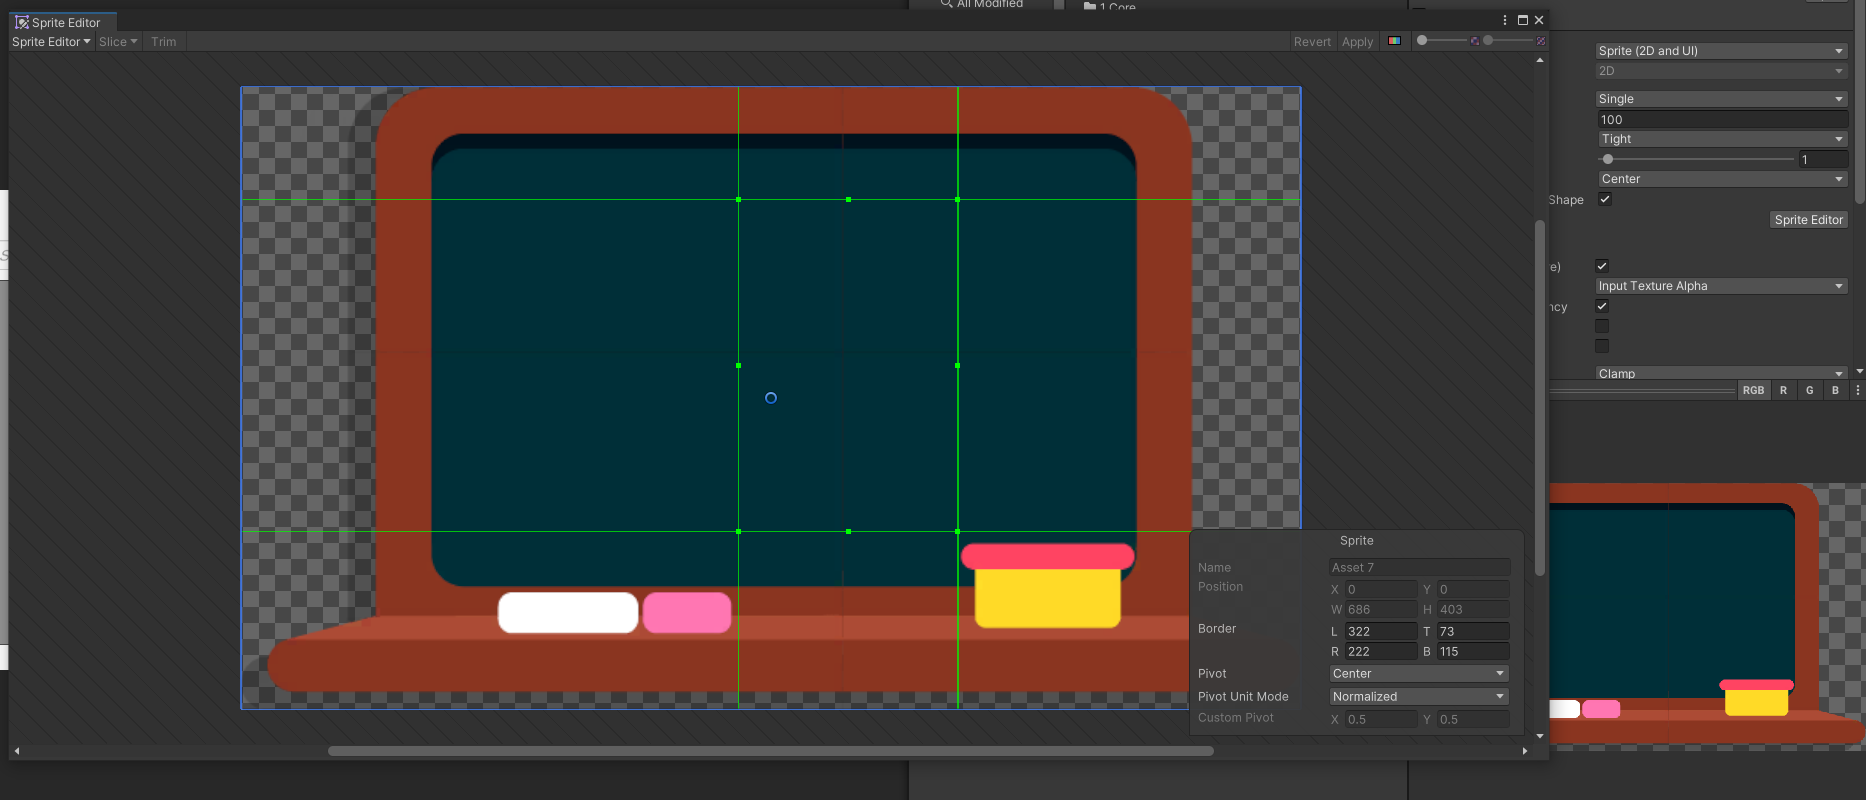
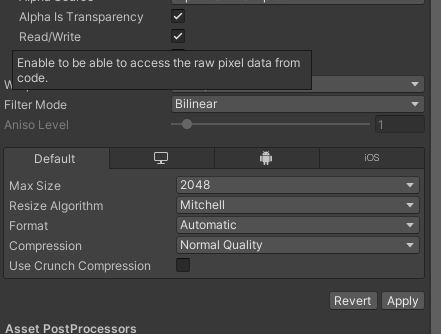
Bước 2: Bật Read/Write option và Apply
Bước 3: Kéo Sprite vào Sprite Texture trong tool
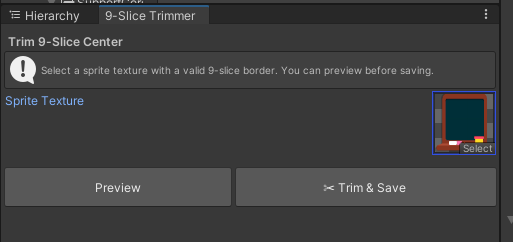
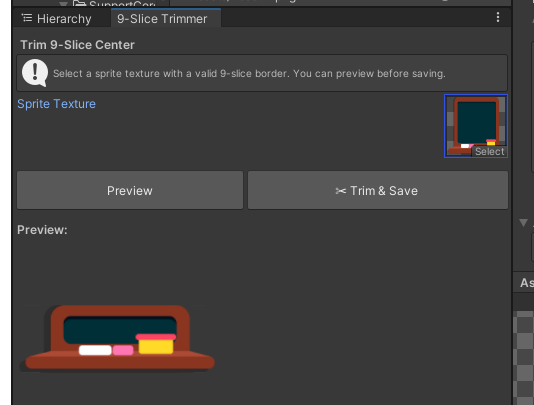
Bước 4: Bấm Preview để kiểm tra ảnh sau khi cắt đã đúng chưa
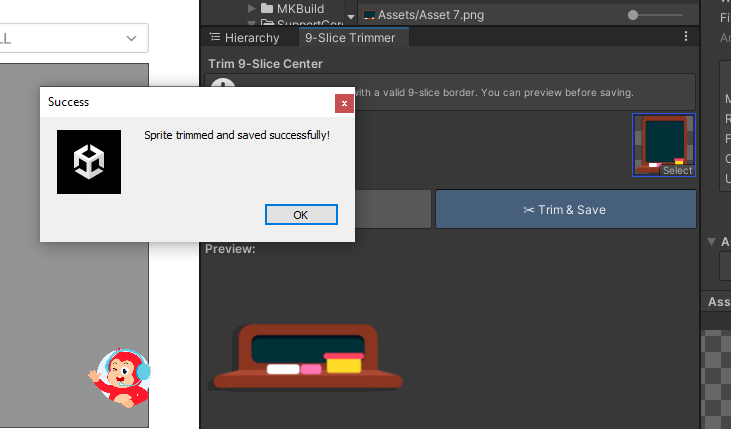
Bước 5: Bấm Trim & Save để cắt Sprite
Bước 6: Tắt Read/Write trong ảnh vừa tạo
Ảnh mới nhận được
Tài liệu tham khảo thêm: https://github.com/KingHipUnity/Unity-NineSliceTrimmer/blob/main/README.md
-
hainv
posted in Monkey Stories 2.0 • read more
Viết thêm Cheat vào file CheatMethodHandle.cs
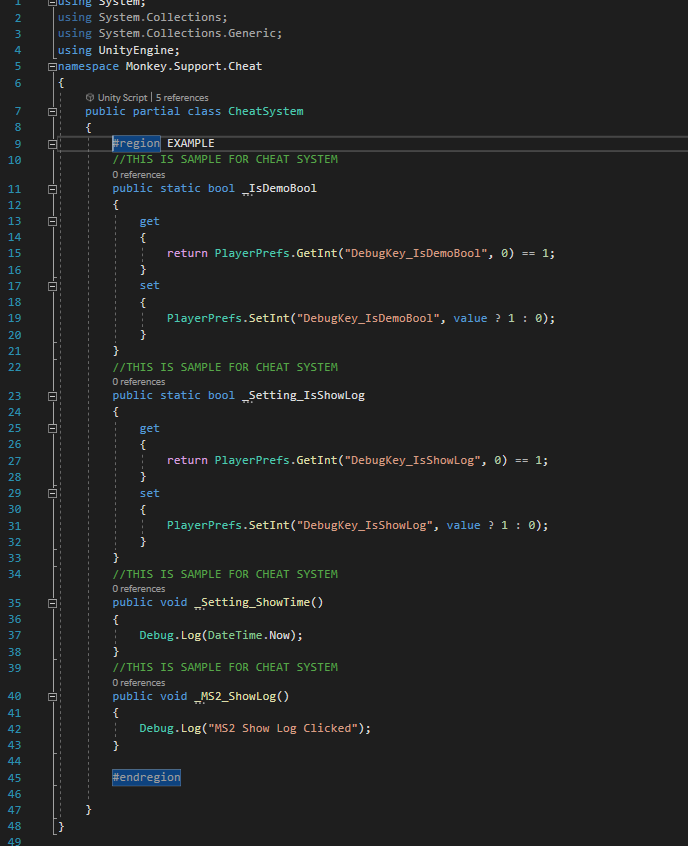
Quy tắc đặt tên Cheat mới_<Section> _<Tên Cheat>
trong đó các Cheat có cùng Section sẽ được gộp vào chung 1 mụcCheat hỗ trợ 2 loại hàm void và biến static bool
ví dụpublic void _MS2_ShowLog() { Debug.Log("MS2 Show Log Clicked"); } public static bool _IsDemoBool { get { return PlayerPrefs.GetInt("DebugKey_IsDemoBool", 0) == 1; } set { PlayerPrefs.SetInt("DebugKey_IsDemoBool", value ? 1 : 0); } }Để sử dụng Cheat, bấm vào button đầu khỉ ở ngoài màn hình
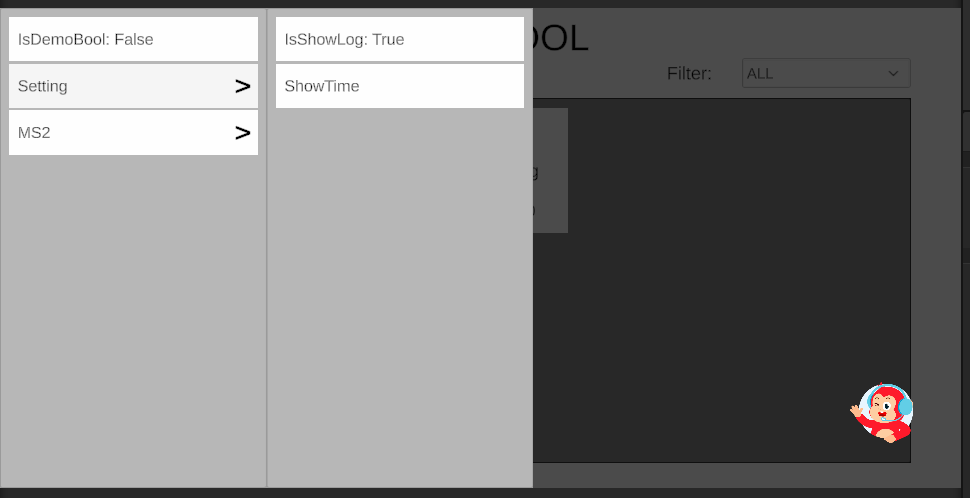
Click vào Section để mở ra các Cheat trong cùng 1 section
Click vào từng Cheat để thực hiện hàm cheat -
hainv
posted in Monkey Stories 2.0 • read more
Script Build được viết trong File MKBuild.cs
-
Đối với build bằng Unity Editor. Chọn Build trên thanh menu và chọn mục cần build
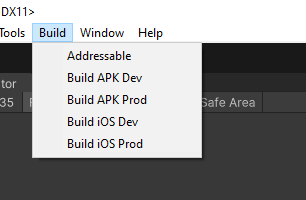
Sau khi build xong output file sẽ ở folder Build ( ngang hàng với Folder Assets )
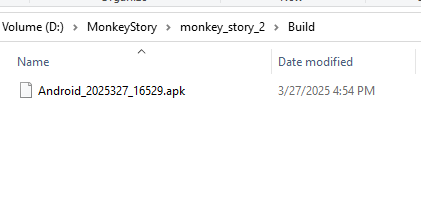
Định dạng file APK: Android_yyyyMd_Hm.apk -
Đối với sử dụng trong pipeline CI/CD
Sử dụng Command:
<Path To Unity Editor> -projectPath <Path To Project> -executeMethod Monkey.BuildTool.Editor.MKBuild.Build -outputPath <Path Output> -buildPlatform <Platform> -isProd true -batchmode -quit
Platform: bao gồm: Android, iOS
isProd: true hoặc false
Ví dụ
/Applications/Unity/Hub/Editor/2022.3.57f1/Unity.app/Contents/MacOS/Unity -projectPath /Users/monkey/Workspace/monkeyx_ci/monkey_story_2 -executeMethod Monkey.BuildTool.Editor.MKBuild.Build -buildPlatform iOS -isProd true -outputPath /Users/monkey/Workspace/monkeyx_ci/build/ios -batchmode -quit -
-
hainv
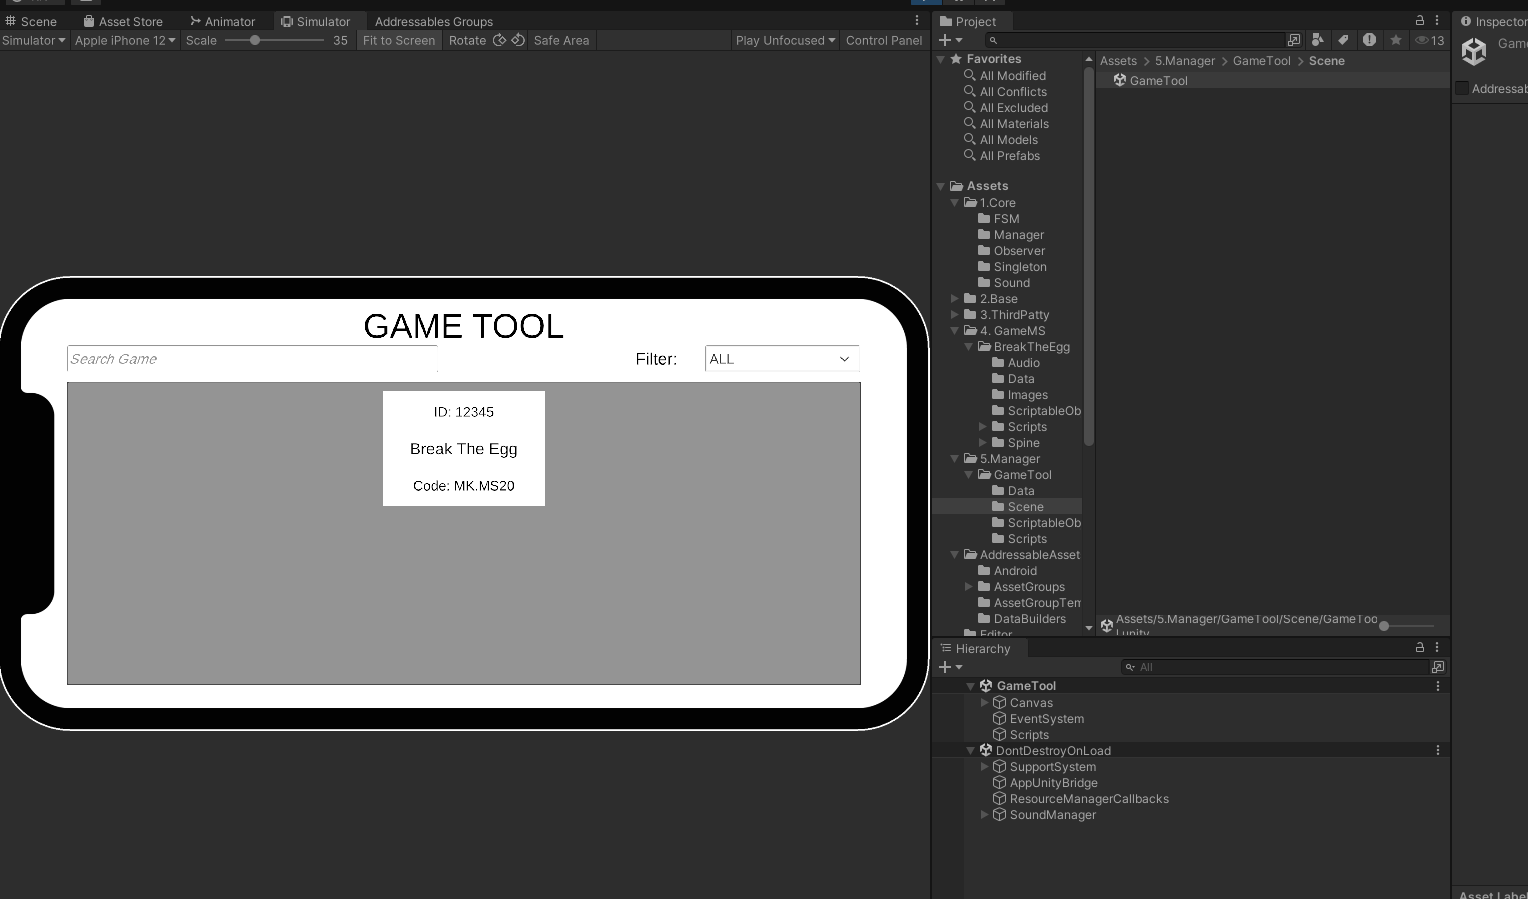
posted in Monkey Stories 2.0 • read more
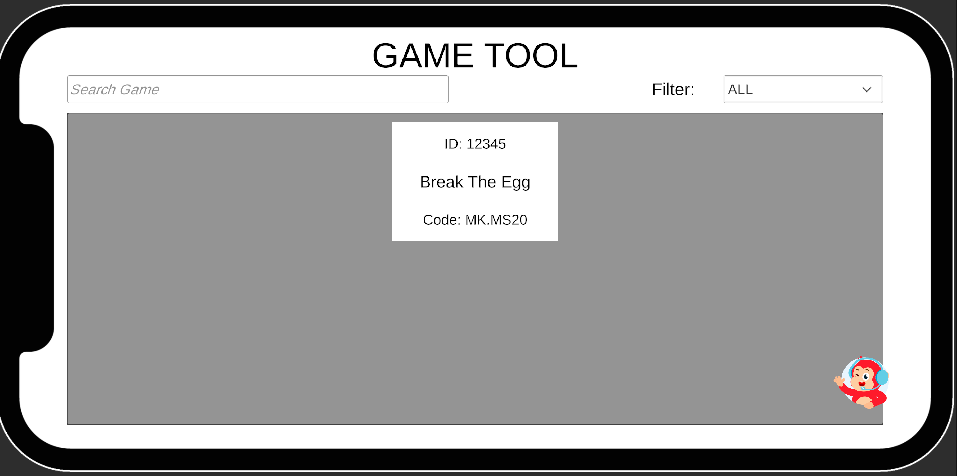
Các bước thực hiện để có thể test game bằng Game Tool
Bước 1: Xoá các thành phần không cần thiết trong game nếu có
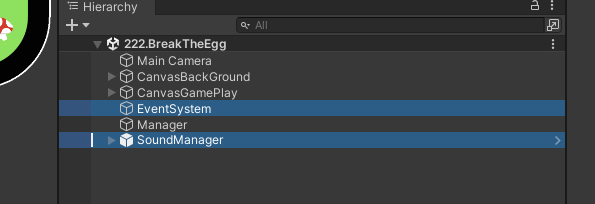

EventSystem, SoundManager, AudioListener đã được load trong Game Tool nên không cần để trong scene game.Bước 2: Gán Addressable cho Scene game
2.1: Mở cửa sổ Addressables Groups bằng cách sau:
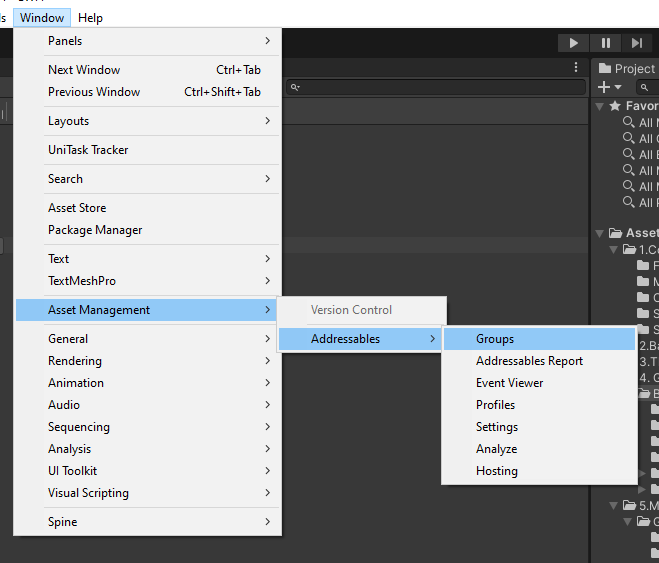
2.2: Kéo Scene game vào group Games trong Addressable. Nếu game ở local thì kéo vào group Games_Local thay vì group Games
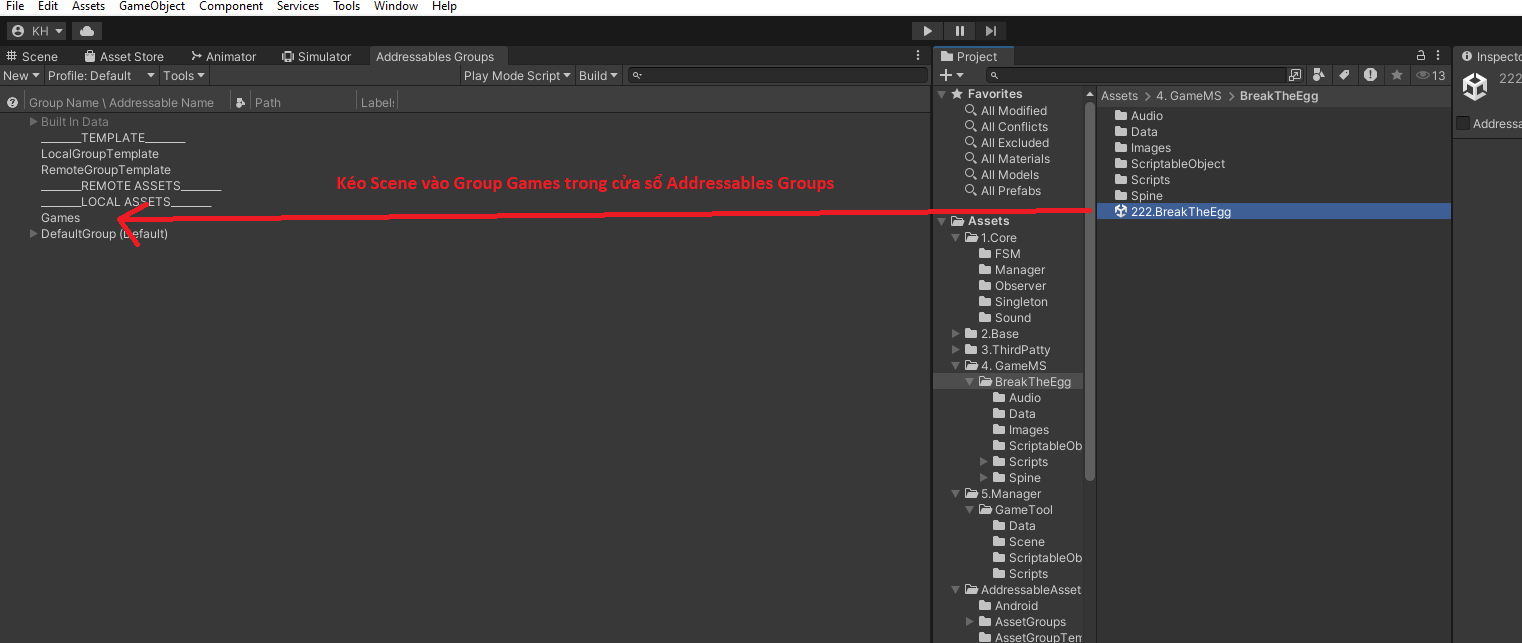
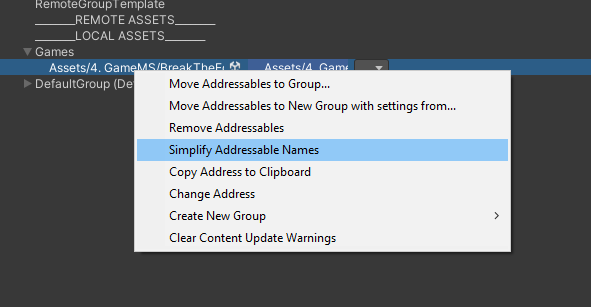
2.3: Chuột phải vào Addressable vừa kéo chọn Simplify Addressable Name
Bước 3: Thêm Game Config trong File GameConfigSO trong đường dẫn: Assets/5.Manager/GameTool/Data
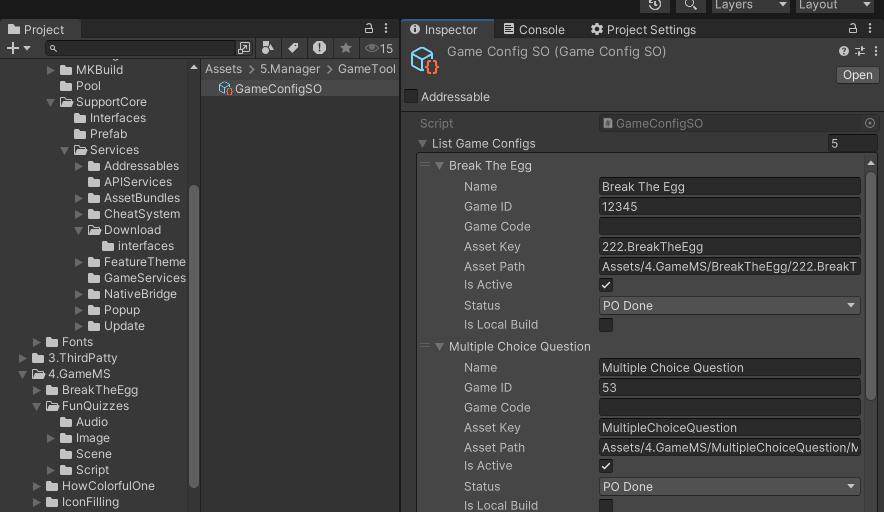
- ở mục Asset Key: Điền tên của scene game
- ở mục Asset Path: Điền đường dẫn đến scene đó
- ở mục status lưu ý chọn đúng tiến độ của game để hiển thị màu button cho chính xác với quy định chung được diễn giải ở scene
- IsLocalBuild = true nếu muốn build game ở local
Bước 4: Chạy Scene GameTool và test lại.